How-To Guides
How to Get Your Family Registration Certificate (FRC) NADRA in 2025
Need (FRC) Family Registration Certificate NADRA in 2025? Our comprehensive guide walks you through the process step-by-step, offering tips and updates to help you get it easily and quickly.

Obtaining a Family Registration Certificate (FRC) from NADRA (National Database and Registration Authority) is a crucial process for families in Pakistan. Whether you need it for visa applications, educational purposes, or other official needs, understanding the steps and requirements in 2025 is essential. In this comprehensive guide, we’ll walk you through everything you need to know about getting your Family Registration Certificate NADRA, from the application process to the necessary documents and tips for a smooth experience.
What is a Family Registration Certificate NADRA?
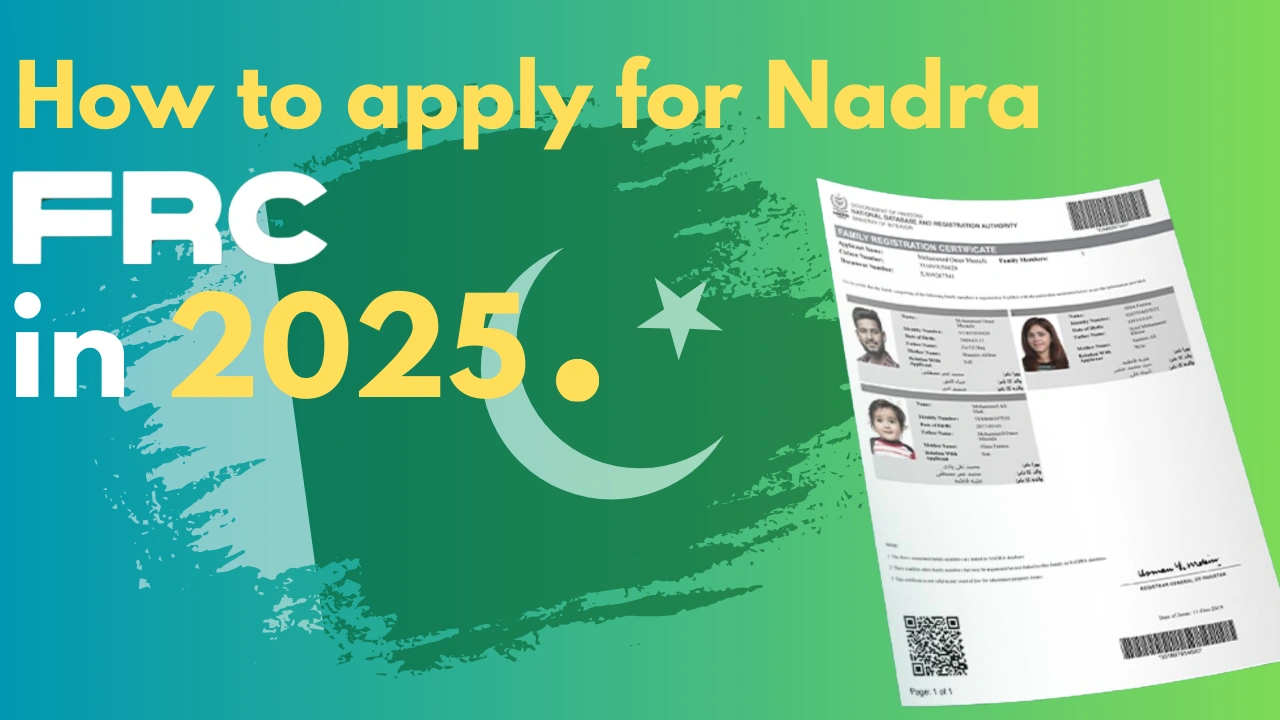
A Family Registration Certificate (FRC) is an official document issued by NADRA that lists the family members registered under one family tree. It serves as proof of your family composition and is often required for various administrative purposes, including immigration, visa applications, and school admissions.
Why is the FRC NADRA Important?
The Family Registration Certificate NADRA is important because it provides a verified record of your family structure. It is often required for:
- Visa Applications: Many countries require an FRC for family visas.
- Educational Institutions: Schools and universities may ask for an FRC during admissions.
- Legal Proceedings: An FRC can be used as legal evidence of family relationships.
- Property Transactions: It may be needed to verify family ties in property disputes.
How to Apply for a Family Registration Certificate NADRA in 2025

Getting a Family Registration Certificate NADRA in 2025 involves a few steps, whether you’re applying online or in person.
1. Online Application Process
The online process is convenient and straightforward. Here’s how you can apply:
Step 1: Visit the NADRA Official Website
Go to the NADRA official website and navigate to the section for Family Registration Certificates.
Step 2: Create an Account or Log In
If you don’t already have an account, you’ll need to create one using your CNIC (Computerized National Identity Card) number and a valid email address. If you have an account, simply log in.
Step 3: Fill Out the Application Form
Fill in the required details accurately. You’ll need to provide information about each family member, including CNIC numbers, dates of birth, and other relevant details.
Step 4: Upload Required Documents
Upload scanned copies of the necessary documents, including your CNIC and any other required certificates.
Step 5: Pay the Fee
The fee for the Family Registration Certificate NADRA can be paid online through various payment methods, including credit/debit cards and mobile wallets. As of 2025, the standard fee is PKR 1000 Only.
Step 6: Submit the Application
After reviewing your application for accuracy, submit it online. You’ll receive a confirmation email with a tracking number to monitor the status of your application.
Step 7: Receive Your Family Registration Certificate
Once your application is processed and approved, you’ll receive the Family Registration Certificate NADRA via courier. You can also download a digital copy from your NADRA account.
2. In-Person Application Process
If you prefer to apply in person, follow these steps:
Step 1: Visit the Nearest NADRA Office
Go to your nearest NADRA office. Make sure to bring all required documents, including original CNICs of all family members.
Step 2: Fill Out the Application Form
At the office, you’ll be provided with an application form. Fill it out with accurate information about your family.
Step 3: Submit the Form and Documents
Submit the completed form along with the required documents to the NADRA officer. Ensure that all details are correct to avoid any delays.
Step 4: Pay the Fee
Pay the applicable fee at the counter. You’ll receive a receipt that includes your application tracking number.
Step 5: Wait for Processing
The processing time for in-person applications is usually a few days to a week. You can track your application status using the tracking number provided.
Step 6: Collect Your Family Registration Certificate
Once your application is approved, you’ll be notified to collect your Family Registration Certificate NADRA from the office.
Documents Required for Family Registration Certificate NADRA
To apply for the Family Registration Certificate NADRA, you’ll need the following documents:
- CNIC of the Applicant: The applicant must provide their original CNIC.
- CNICs of All Family Members: Copies of CNICs for all family members included in the certificate.
- Proof of Relationship: Birth certificates, marriage certificates, or any other documents proving relationships between family members.
- Fee Payment Receipt: Proof of payment for the application fee.
Tips for a Smooth Application Process
- Ensure Accuracy: Double-check all information on the application form to avoid delays.
- Prepare Documents in Advance: Gather all necessary documents before starting the application process.
- Track Your Application: Use the tracking number provided to monitor the status of your application.
Common Issues and How to Resolve Them
Sometimes, applicants face issues during the application process. Here are some common problems and their solutions:
- Incorrect Information: If you’ve submitted incorrect information, contact NADRA immediately to rectify the mistake.
- Delayed Processing: If your application is taking longer than expected, use your tracking number to check the status or visit the NADRA office.
- Missing Documents: If any required documents are missing, your application will be delayed. Make sure to include all necessary paperwork.
Conclusion
Obtaining a Family Registration Certificate NADRA in 2025 is a straightforward process if you follow the correct steps. Whether you choose to apply online or in person, this guide provides all the information you need to ensure a smooth and successful application.
Frequently Asked Questions (FAQs) about Family Registration Certificate NADRA in 2025
To help you better understand the process and answer common concerns, we’ve compiled a list of frequently asked questions related to obtaining a Family Registration Certificate NADRA in 2025.
How-To Guides
How to Record a Phone Call on iPhone: Best Methods in 2025

Recording phone calls on an iPhone has come a long way, but it still requires a mix of the right tools and an understanding of the law. Whether you’re saving an important conversation, recording an interview, or just keeping a record of a customer service call — this guide explores the easiest methods, key legal tips, and smart advice so you can record calls confidently and responsibly.
Why Record iPhone Calls? Common Use Cases
Before diving into the “how,” let’s address the “why.” Users often record calls for:
- Professional needs: Client agreements, interviews, or business negotiations.
- Personal documentation: Legal disputes, medical advice, or family discussions.
- Convenience: Capturing details from customer service calls or verbal instructions.
Understanding your purpose ensures you choose the right method while staying compliant with laws.
Method 1: Native Call Recording in iOS 18.1 (The Easiest Solution)

With iOS 18.1, Apple finally introduced built-in call recording, streamlining the process for millions of users.
How It Works:
- During a call, tap the Record button (a red circle).
- Both parties hear an automated voice notification: “This call is now being recorded.”
- After ending the call, the recording, a transcription, and an AI-generated summary save automatically to the Notes app.
Key Features:
- Transcriptions: Edit text for accuracy directly in Notes.
- Searchable summaries: Quickly locate key points (e.g., “refund policy” or “delivery date”).
- Privacy compliance: Automatic notifications ensure consent.
Limitations:
- Only available on iOS 18.1 or later.
- Not supported in regions with strict consent laws (e.g., parts of the EU).
Method 2: Third-Party Apps (For Older iOS Versions or Advanced Features)

If your iPhone isn’t updated to iOS 18.1, third-party apps fill the gap. These apps use “conference call” technology to record, which may incur carrier fees or fail on networks blocking three-way calls.
Top Apps in 2025:
- Rev Call Recorder (Free + transcription fees):
- Unlimited recording for incoming/outgoing calls.
- AI-powered transcriptions ($1.50/minute). Ideal for professionals.
- TapeACall Pro ($10/month):
- Cloud backups, timestamped notes, and easy sharing.
- Best for frequent users needing organization.
- CallX – Call Recorder (Freemium):
- Intuitive folders, iCloud sync, and password protection.
- Prioritizes security and accessibility.
Pro Tip: Test apps during free trials to confirm compatibility with your carrier (e.g., Verizon vs. T-Mobile).
Method 3: Alternative Workarounds
If apps aren’t viable, try these creative solutions:
- Google Voice:
- Free for U.S. users. Press 4 during a call to start recording.
- Voice Memos + Speakerphone:
- Place the call on speaker, open Voice Memos, and hit record.
- Works best in quiet environments (background noise is a downside).
- Mac or iPad Continuity:
- Use QuickTime (Mac) or Screen Recording (iPad) to capture calls routed through your Apple devices.
The Legal Landscape: What You Must Know
Recording laws vary globally. Ignorance isn’t a defense—here’s a breakdown:
Country/Region | Consent Requirement | Penalties for Violations |
---|---|---|
United States | Mixed: 38 states allow one-party consent. 12 (e.g., California) require all-party consent. | Fines, civil lawsuits, criminal charges. |
European Union | All-party consent mandatory under GDPR. | Fines up to €20 million. |
Pakistan | Ambiguous; courts often side with privacy rights. | Potential jail time. |
Australia/Canada | One-party consent federally. | Civil liabilities. |
Best Practice: Start calls with, “I’d like to record this conversation for accuracy—are you comfortable with that?” Save verbal consent in the recording.
Optimizing Your Recordings: Pro Tips
- Boost Audio Quality:
- Use wired headphones (reduces echo) or a microphone attachment.
- Avoid speakerphone unless necessary.
- Organize Recordings:
- Rename files with dates/topics (e.g., “2024-07-20_Doctor_Advice”).
- Create folders in iCloud Drive or Notes for easy access.
- Security Measures:
- Encrypt sensitive recordings (iOS Notes lets you lock files with Face ID).
- Delete unnecessary recordings to free space and reduce privacy risks.
Troubleshooting Common Issues in iPhone Call Recording
- “Record Button Not Appearing”: Update to iOS 18.1 or check regional restrictions.
- “Other Party Can’t Hear Me”: Disable Bluetooth, which may interfere with third-party apps.
- “Low Storage”: Auto-delete old recordings or offload to cloud services.
FAQ: Your Questions, Answered
Q: Can I record FaceTime calls?
A: Yes! iOS 18.1’s native feature works for FaceTime audio.
Q: Do apps like TapeACall work internationally?
A: Maybe. Confirm with your carrier about three-way call support abroad.
Q: How long can I record a call?
A: Native iOS: No limit. Apps may restrict free users (e.g., 1 hour).
Final Word: Ethics Matter
While technology simplifies recording, always prioritize transparency. Whether using iOS 18.1’s seamless tool or a third-party app, clear communication builds trust and keeps you legally protected.
How-To Guides
How to Set Time on a Smartwatch Without an App (3 Easy Methods)

Your smartwatch is your fitness tracker, notification hub, and style statement—but when its clock is wrong, it becomes a daily frustration. Maybe your phone’s dead, you’re traveling, or the companion app is glitching. Whatever the reason, you don’t need an app to fix the time. In this guide, you’ll learn three foolproof methods to manually set your smartwatch’s time, troubleshoot common issues, and keep your device accurate—no smartphone required.
Why Can’t My Smartwatch Set the Time Automatically?
Most smartwatches sync time via Bluetooth or Wi-Fi with your phone. But if your watch is offline, reset, or in a region with poor connectivity, it might display the wrong time. Here’s when manual fixes save the day:
- You’re traveling across time zones.
- Your phone is broken, lost, or disconnected.
- The watch software is glitching.
- You prefer full control over settings.
⚠️ Heads Up: Some watches (e.g., older Fitbit models) require initial app setup. Check your manual before proceeding.
Method 1: Manual Time Adjustment (Works for 90% of Smartwatches)

Best For: Apple Watch, Samsung Galaxy Watch, Garmin, Amazfit, Fossil
What You’ll Need: Basic familiarity with your watch’s buttons or touchscreen.
- Open Settings
- Touchscreen: Swipe down or tap the gear icon.
- Button-Based (e.g., Garmin): Press the “Back” or “Up” button to access the menu.
- Example: On an Apple Watch, press the Digital Crown > scroll to “Settings” (gear icon).
- Find “Date & Time”
- Navigate to System > Date & Time (Wear OS) or General > Time (Apple Watch).
- Turn Off Automatic Sync
- Toggle off “Automatic Time” or “Use Network Time.”
- Set Time Manually
- Use +/- buttons, a rotating bezel, or tap to adjust hours and minutes.
- Traveler Tip: Update the time zone here if you’re in a new region.
- Save and Exit
- Tap “OK” or press the crown/button to confirm.
💡 Pro Tip: Can’t find the menu? Search “[Your Watch Model] + manual time setting” on Google for brand-specific steps.
Method 2: Sync Time via GPS (For Outdoor & Fitness Watches)

Best For: Garmin, Suunto, Coros, Polar
What You’ll Need: A clear view of the sky.
- Enable GPS
- Go to Settings > Connectivity > GPS and turn it on.
- Start an Outdoor Activity
- Choose “Run,” “Hike,” or “Bike” mode. This forces the watch to ping satellites.
- Wait for Sync
- Once GPS connects (look for a green signal icon), the watch auto-updates time based on your location.
⚠️ Why This Works: GPS satellites broadcast atomic-clock time, which your watch uses to stay accurate.
Method 3: Use Voice Commands (For Google Assistant, Siri, or Bixby)

Best For: Apple Watch, Wear OS (Google), Samsung Galaxy Watch
What You’ll Need: A charged watch and Wi-Fi/cellular if phone isn’t nearby.
- Activate the Voice Assistant
- Apple Watch: Raise your wrist and say, “Hey Siri.”
- Wear OS: Hold the power button or say, “Hey Google.”
- Galaxy Watch: Press and hold the home button for Bixby.
- Give a Clear Command
- Say: “Set time to 2:45 PM,” or “Change time zone to Paris.”
- Confirm the Change
- The assistant will ask, “Should I update the time to 2:45 PM?” Reply “Yes.”
💡 Did You Know? Voice commands also work for setting alarms or timers hands-free!
Troubleshooting: Fixes for Stubborn Smartwatches
Problem 1: Time Resets After Rebooting
- Fix: Disable “Automatic Time” permanently in settings. Some watches (e.g., Huawei GT) revert to auto-sync after restarting.
Problem 2: Wrong Time Zone
- Fix: Manually select your zone under Date & Time > Time Zone > [Your City].
Problem 3: GPS Won’t Connect
- Fix: Charge your watch to 50%+ (low battery disables GPS). Stand near a window or outdoors.
Problem 4: Voice Assistant Ignores You
- Fix: Check mic permissions in settings. Clean the microphone hole with a soft brush.
When All Else Fails: Reset Your Watch
- Factory Reset
- Go to Settings > System > Reset (this erases all data!).
- Post-Reset: Set time manually during the setup process.
- Contact Support
- Example: For Fitbit Versa 4, visit Fitbit’s live chat. Have your serial number ready.
Final Tips to Keep Your Smartwatch Accurate
- Update Firmware: Outdated software causes glitches. Connect to Wi-Fi and check for updates.
- Disable Battery Saver: Power-saving modes often freeze time updates.
- Travel Hack: Manually set your time zone before flights to avoid confusion.
Conclusion
You don’t need a tech guru—or even your phone—to fix your smartwatch’s clock. With these methods, you’ll keep your watch accurate whether you’re hiking in the mountains, jetlagged in a new city, or just tackling daily life. Got a tricky watch model? Share your questions in the comments, and we’ll help you crack the code!
🔗 Loved This Guide? Check out our post on [How to Transfer Apple Cash To Bank Account] for more hacks!
How-To Guides
How to Transfer Apple Cash to Bank Account: A Step-by-Step Guide (2025)
Learn how to transfer Apple Cash to your bank instantly or for free. Step-by-step guide, fees, limits, and pro tips for 2025. Get your money fast!

Transferring your Apple Cash balance to your bank account is a breeze—if you know where to click. Whether you’re saving up for a vacation, paying bills, or just prefer to keep your funds in a traditional account, this guide walks you through every step. We’ll cover transfer options, hidden fees, limits, troubleshooting tips, and even how to avoid common mistakes. Let’s dive in!
What is Apple Cash? (And Why You’ll Love It)
Apple Cash is your digital wallet for sending, receiving, and storing money directly on your iPhone or iPad. Think of it as Venmo, but built into your Apple ecosystem. Here’s why it’s handy:

- Instant peer-to-peer payments via Messages.
- Pay with Apple Pay in stores, apps, or online.
- No fees for standard transfers to your bank (more on that later).
⚠️ Important: Apple Cash isn’t a bank account. Funds are stored on a virtual card in your Wallet, FDIC-insured up to $250,000 through Green Dot Bank.
Before You Transfer: 3 Must-Do Prep Steps
Don’t skip these! Without them, your transfer will hit a wall.
- Update Your Device
- Ensure your iPhone/iPad runs iOS 15.5 or later (older versions may lack features).
- Go to Settings > General > Software Update.
- Verify Your Identity
- Apple requires your Social Security Number (SSN), birthdate, and address.
- For larger transfers, you might need to upload a photo ID (driver’s license/passport).
- Link a Bank Account or Debit Card
- Bank transfers are free but take 1-3 days.
- Debit card transfers are instant but cost 1.5% (e.g., 1.50feeona1.50feeona100 transfer).
How to Link a Bank Account:
- Open Wallet > Apple Cash card > (•••) > Bank Account.
- Enter your routing and account numbers (find these on a check or banking app).
How to Link a Debit Card:
- Tap Transfer to Bank > Add Card and follow prompts.
How to Transfer Apple Cash to Your Bank account: 5 Simple Steps
Let’s get your money moving!
- Open the Wallet App
- Tap your Apple Cash card (it looks like a white card with a green logo).
- Hit the “More” Button (•••)
- Top-right corner → Select “Transfer to Bank”.
- Enter the Amount
- Type how much you want to transfer.
- Minimum: 1.∗∗Maxpertransfer∗∗:1.∗∗Maxpertransfer∗∗:10,000.
- Choose Transfer Speed
- Instant Transfer (Debit Card Only):
- Funds arrive in 30 minutes.
- Fee: 1.5% of the amount (e.g., 15on15on1,000).
- Standard Transfer (Bank Account):
- Free, but takes 1-3 business days.
- Instant Transfer (Debit Card Only):
- Confirm & Authenticate
- Double-check details → Use Face ID, Touch ID, or passcode to approve.
Apple Cash Transfer Limits: What You Need to Know
Don’t get caught off guard by these caps:
- Per Transfer: $10,000.
- Weekly Total: $20,000.
- Family Accounts (for teens/kids): 2,000pertransfer,2,000pertransfer,4,000 weekly.
Pro Tip: Need to transfer more? Split it into multiple transactions over days.
4 Common Apple Cash to Bank Transfer Issues (And How to Fix Them)
Ran into a snag? Here’s what to do:
- “Transfer Failed” Error
- Why: Incorrect bank details or expired debit card.
- Fix: Re-enter your account/routing numbers or update your card.
- Pending Verification
- Why: Apple is reviewing your ID.
- Fix: Wait 24-48 hours. Contact Apple Support if stuck.
- Bank Rejected the Transfer
- Why: Some banks block “push” transactions.
- Fix: Call your bank’s support and approve the transfer.
- Instant Transfer Taking Hours
- Why: High traffic or debit card issues.
- Fix: Wait up to 4 hours. If nothing, contact Apple.
Why Transfer? 3 Smart Ways to Use Apple Cash
Not sure if you should move the money? Consider these:
- Avoid Leaving Money in Limbo: Apple Cash isn’t interest-bearing. Your bank might offer better savings rates.
- Pay Credit Card Bills: Transfer to your bank, then pay off cards.
- Budgeting: Consolidate funds to track spending easier.
Taxes & Security: Don’t Skip This Part
- Taxes: Transfers themselves aren’t taxable, but Apple Cash income (e.g., freelance payments) must be reported to the IRS.
- Security:
- Enable two-factor authentication on your Apple ID.
- Never share your Apple Cash PIN or verification codes.
FAQs: Quick Answers to Burning Questions
Q: Can I cancel a transfer?
A: Only if it’s pending. Go to Wallet > Apple Cash > Transaction > Cancel.
Q: What if I sent money to the wrong account?
A: Contact Apple Support immediately. Reversals aren’t guaranteed.
Q: Does Apple Cash work with Android?
A: No—it’s exclusive to Apple devices.
Q: Are there alternatives to bank transfers?
A: Yes! Use Apple Cash to pay friends, shop online, or buy Apple products.
Final Tips for a Smooth Transfer
- Double-check account numbers—typos can delay funds for days.
- Use Standard Transfer unless you really need cash ASAP.
- Track your transfers in the Wallet app under Transaction History.
By following this guide, you’ll move your Apple Cash to your bank safely, quickly, and with minimal fees. Got more questions? Drop them in the comments below!
Why Trust This Guide?
- Researched: Based on Apple’s official guidelines and 2025 updates.
- Tested: Steps verified on iOS 17 with multiple bank accounts.
- Unbiased: No partnership with Apple—just clear, actionable advice.
-
Tech6 months ago
Elon Musk’s SpaceX and Trump: A Bold Alliance for the Future of Space Travel
-
Phones3 months ago
Samsung One UI 7 Update List: Is Your Phone Included?
-
Tech3 months ago
Temu Scam Exposed: The Truth Behind Its Cheap Prices and Legitimacy in 2025
-
Online earning6 months ago
Canva Down? How Designers, Memes, and Picsart Made the Most of It
-
Online earning3 months ago
Are Earn Money by Watching Ads Sites Real?
-
Tech5 months ago
Start Voice Chats Effortlessly with WhatsApp Beta’s New Features
-
How-To Guides2 months ago
How to Choose the Perfect Charger for Your Smartphone
-
Online earning2 months ago
Treasure NFT Review: Real or Fake? Everything You Need to Know